Using Magpie
Load Magpie and skip any introductions or tutorials that may open when first ran. We only want to know how to use this program for Anachronox.
Close anything that pops up until you have an empty workspace as shown below.
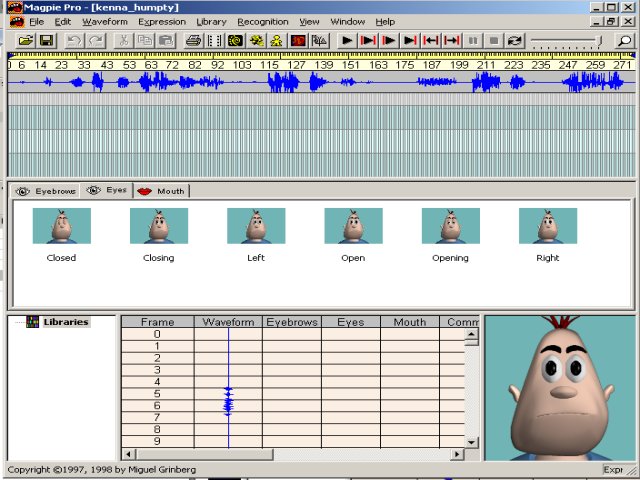
The first thing you must do in Magpie is open a waveform. Click File/Open and open the wav kenna_humpty.wav which should be located in c:\anachronox\tools\modeltools\magpie\anachronox\boots This is a cute little .wav of my two year old duaghter singing humpty dumpty and the one I used to learn about Magpie.
Once you open the .wav your screen should look like the one below
You can use the default Expression set that ships with Magpie with a few modifications, but we are going to replace this set into one that is compatible with Anachronox and shows Boots as the character.
Click Expression/Change Expression Set. You will be given the following popup window.
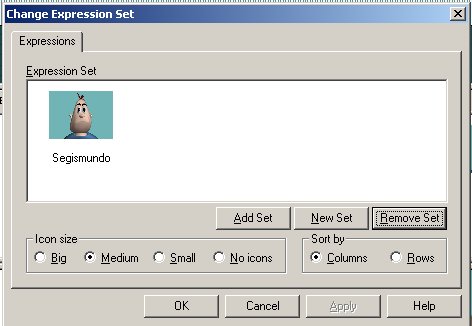
Click on Add Set. Browse to the c:\anachronox\tools\modeltools\magpie\anachronox\boots directory and open the boots.mge file found there. Boots should now appear in the Expression Sets window. Select boots and click the OK button.
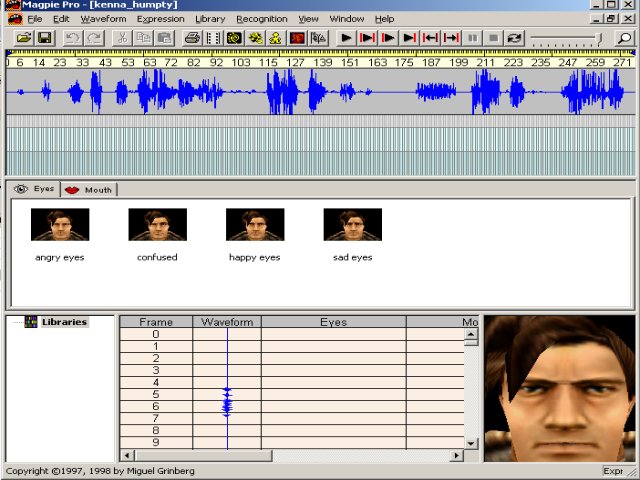
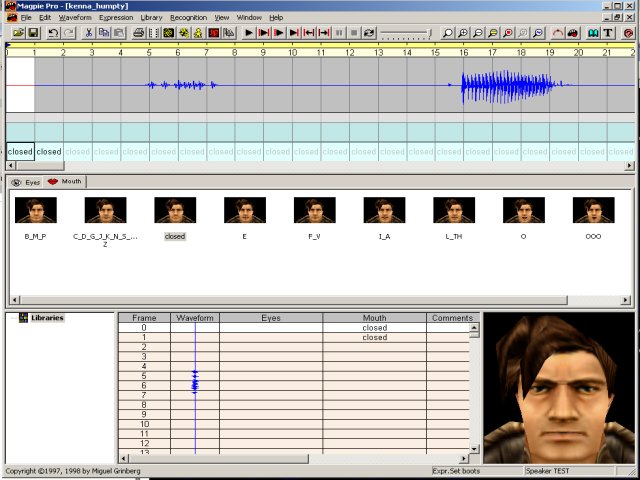
You will be returned to the editing window. You should notice that Boots now appears in the Preview and Expressions Windows. As in the example below.
Completely ignore the Eyes Expressions. They are ignored by Anachronox anyway. They were just something I used to help know where to insert modeldex cmds in Planet.
I have already done all of the hard work of figuring out what sounds corrispond to what .lip Letter for Anachronox. Here is a quick rundown for the techies out there.
There are many actors in anox. They each have 18 facial morphs. Each morph is a picture of a different face position. The first 9 are reserved for the mouth speech morph phonemes. 10-13 are face morphs and 14-17 are eye morphs.
Each morph is considered a channel.
And break down like this.
| MDA Morph | .LIP Letter | Phonemes |
|---|---|---|
mp.01 |
A |
C,D,G,J,K,N,S,T,Y, Z |
mp.02 |
B |
F,V |
mp.03 |
C |
L,TH |
mp.04 |
D |
B,M,P |
mp.05 |
E |
Q,R,U,W |
mp.06 |
F |
E |
mp.07 |
G |
I,A |
mp.08 |
H |
O |
mp.09 |
I |
OOO |
ex01 |
NONE |
Smirk face |
ex02 |
NONE |
Happy face |
ex03 |
NONE |
Sad face |
ex04 |
NONE |
Angry face |
ex05 |
NONE |
Smirk eyes |
ex06 |
NONE |
Happy eyes |
ex07 |
NONE |
Sad eyes |
ex08 |
NONE |
Angry eyes |
-000 |
NONE |
Ambient face |
-010 |
NONE |
Normal face(ambient) |
Note: I have not found this data breakdown anywhere, so if you use it please give me credit for my contribution - Creaper
Now lets create a .lip to use for Anachronox using the humpty.wav
Select View | Options. Under the General tab, check that the Automatic inbetweening for empty frames option is set to on, and that the Default frame rate for new projects is set to 30 frames per second. Click OK to close the options dialog box.
First click on the Mouth tab, so the different mouth expressions are shown.
Play the .wav so you know what the whole thing sounds like by clicking the ![]() or selecting waveform/play.
or selecting waveform/play.
Select the range of frames from 0 to 21. The frame behind the mouse cursor is always shown on the right section of the status bar.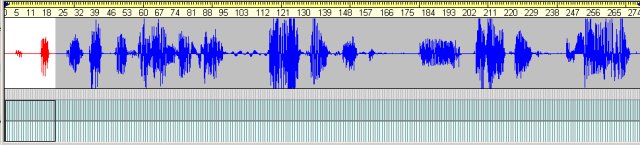
• Select Waveform | Zoom | Zoom to selection or click the toolbar button![]() . The selected frames are magnified to cover the entire window width.
. The selected frames are magnified to cover the entire window width.
• Move the mouse to the yellow ruller (above the waveform graphic) until it turns into the double-arrow shape and double click with the left mouse button. This will set the current working segment to the part of the waveform shown on the window. Now all the play commands will work on this range only.
• Select the first frame of the waveform (frame 0) by clicking it with the left mouse button. Double click the Closed expression image. Note that it is copied to the exposure sheet at the selected frame.
Now assign the following expressions at the specified frames to breakdown the complete work segment:
| At Frame | Assign |
|---|---|
0 |
Closed Mouth |
16 |
I_A |
18 |
B_M_P |
19 |
Closed Mouth |
Note how Magpie Pro fills the empty spaces between filled frames (they are displayed on gray on the bar sheet view).
Play the selection. You will see boots in the preview window mock the work Hump.
Select Waveform | Zoom off or click on the toolbar button![]() to restore the full view of the waveform. Double click the yellow ruler to restore the work area to the complete waveform.
to restore the full view of the waveform. Double click the yellow ruler to restore the work area to the complete waveform.
Continue repeating these steps all the way through the waveform. Select a segment listen to it then assign an appropriate expression at key frames.
Once completed, your sheet should look something like this:
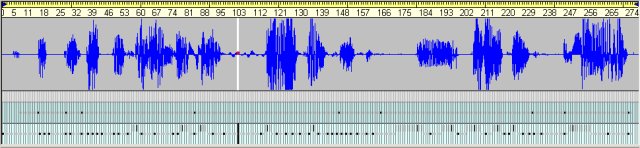
Notice the Phoneme assignments throughout the waveform. Play the whole segment and Boots should mock the whole wave.
Congratulations. You just created a .lip file for Anachronox. I have already defined the key assignments and everything for you, as long as you loaded the .mge file correctly.
Now all you have to do is save it,create a .scn file and tell Planet to use it.
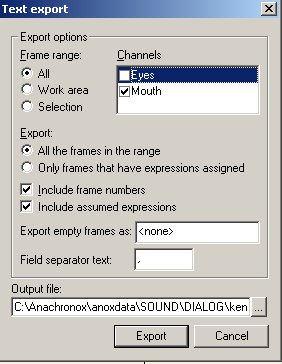
Select File/Export/txt file
Set the next screen as follows:
You will need to create a directory structure for your work. Under anondata/sounds/dialog create the folder myliptest.
under myliptest create the folders /mp3 and /magpie
Click on the ... For the output file save it into the magpie directory you just created as myliptest.lip
Copy the
c:\anachronox\tools\modeltools\magpie\anachronox\boots\kenna_humpty.wav to the mp3 folder.
Now we have to create a .scn file. Very simple. Create a new .txt file in anondata/sounds/dialog/myliptest called myliptest.scn with the following two lines:
soundfile=dialog/myliptest/mp3/kenna_humpty.wav
actor1=dialog/myliptest/magpie/myliptest
Now lets load-up Planet to test it out. For instructions on loading Planet and how to use it see Planet.
Newscript
Put character_stiletto on a path
At 1.0 put a cmd node
playdialogue=dialog/myliptest/myliptest.scn
Play this and look at her mouth