

Forget your silly 10 fps looping quake animated textures. Now you can create complex multi-framed animated textures AND control them from APE. Explosion effects, computer terminal displays, animated 2D user-interface controls, even the mouse! ....the possibilities are endless.
ATD1

type      = animation
colortype = integer
width     = integer
height    = integer
bilinear  = integer (optional, def=1)
clamp     = integer (optional, def=0)
!bitmap
  file    = filename

!bitmap
  ... repeat for all bitmaps
!frame
  bitmap  = integer
  next    = integer (optional)
  wait    = float   (optional)
  x       = integer (optional)
  y       = integer (optional)

!frame
  ... repeat for all frames
| value | meaning |
|---|---|
| 1 | 8-bit greyscale PNG |
| 2 | 8-bit greyscale + 8-bit alpha PNG |
| 3 | 24-bit RGB PNG |
| 4 | 24-bit RGB + 8-bit alpha PNG |
Since this new animated texture code uses frame uploading, having many frames of animation takes up main memory instead of video card texture memory. The amount of video texture memory used is never more than the amount required to store the output frame. However, this doesn't mean animated textures are free and you should frame-output the FF8 opening movie into PNG format and watch it play in Anachronox.
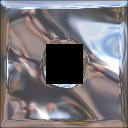
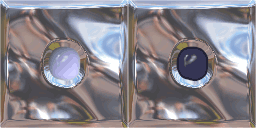
Although they no longer take up video memory, they still do take up main memory, and taking up too much main memory is a bad thing. One way to reduce your RAM usage is to not change the all of the texture in the animation frame. For example, say you skin a robot, and you want one of his lights to blink. Instead of making two copies of the skin with the light either on or off, you can have one frame be the original skin, and one frame be a very small bitmap containing only the part of the skin that changes with the blinking light. Then you can do something like this:
| base.png | on.png | off.png | output |
|---|---|---|---|
 |
 |
 |
 |
ATD1
type=animation
colortype=3
width=128
height=128

!bitmap
  file=models/robot/base.png
!bitmap
  file=models/robot/on.png
!bitmap
  file=models/robot/off.png

# Frame 0 is what is always uploaded to the texture
# before anything is displayed.  In this case, wait
# is -1 so the next frame (1) is immediately processed.

!frame
  bitmap=0
  next=1
  wait=-1

# Frame 1 says to upload on.png at the specified
# offsets into the texture.  Then it waits half
# a second before processing the next frame.

!frame
  bitmap=1
  next=2
  wait=.5
  x=46
  y=44

# Frame 2 uploads off.png at the specified offset.
# This replaces the center light with a picture
# of the light turned off.  It then waits .2
# seconds before looping back to frame 1.

!frame
  bitmap=2
  next=1
  wait=.2
  x=46
  y=44
Look in map joeyproc for some examples in animated textures.